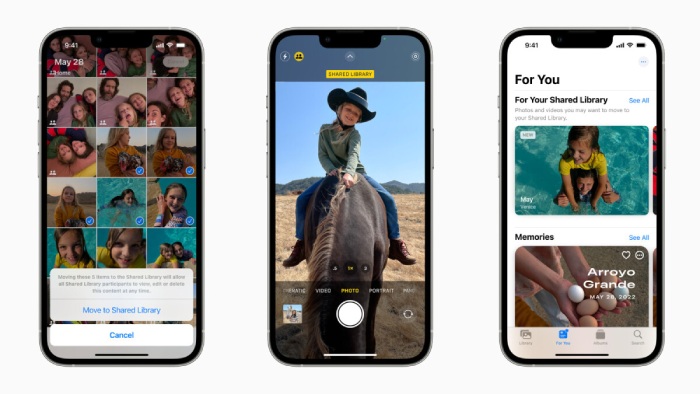
You’re probably already familiar with Shared Albums, but the most recent iPhone software update adds iCloud Shared Libraries. Users of Apple’s iOS 16 can build an extensive library to share with friends and family.
What differentiates a Shared Library from a Shared Album? There are numerous approaches. You can upload images and videos directly into a shared library without having to go through the extra step of adding them to an album. Additionally, adding, editing, and removing photographs and videos is open to all participants.
The Shared Library function is smart, so you can configure it to automatically identify photographs by individuals or dates and provide suggestions for what to share. In essence, it’s a fun function that simplifies the process of sharing images.
Here’s how to setup iOS 16 with the iCloud Shared Photo Library.
1. To begin, click Settings and then Photos.
2. To begin the setup, hit Shared Library in Photos.
3. Add participants.
To invite individuals to share your library, tap “Add Participants.” You will then be directed to a different screen where you can type in people’s names to add them.
After adding the first participant, select “Add Participants” once again to add additional. You can share with up to five other people. When done, select “Continue.”
4. Select method for transferring photos.
You’ll have three choices on the following screen for which pictures should be added to the shared library. If you decide you don’t want to make your complete library available to everyone, you may change your mind after selecting an option since you can see a preview of how it will appear.
- Photos and Videos You Have
Everything in your Personal Library will be transferred to your Shared Library as a result.
- Select either People or Date
Maybe you use your shared library to show family members or friends pictures of your children, dog, or trip. With this option, you may select which images to include based on particular persons (or animals) or dates.
- Select manually
Select any images you want to manually add to your shared library.
To see how your photographs will appear, select “Preview Shared Library” (or you can just hit “Skip and Continue” to skip the preview.) Tap “Continue” to complete the setup if you like the preview.
5. Send out invitations
It’s time to share your Shared Library once it appears to be ready. To send the invite to everyone in a group chat, select “Invite via Messages,” or select “Share URL” to copy the link and share it in another way.
- How to Check IIT GATE 2025 Results Online? Complete Guide - March 19, 2025
- Deadmau5 Sells Song Catalog for $55M to Launch New Music Venture - March 6, 2025
- Japanese Girl Group F5ve to Drop Debut Album ‘Sequence 01’ in May - March 6, 2025


